


Thursday is almost upon us! As the sun sets on October 31st we will don our costumes and take to the streets for some trick or treating and All-Hallows-Eve partying. Orlando Connections is here to bring you some fun, creative and delicious recipes that will be sure to satisfy the scariest (or grumpiest) monsters that come to your door. These recipes are great for any party you might be going to as well!
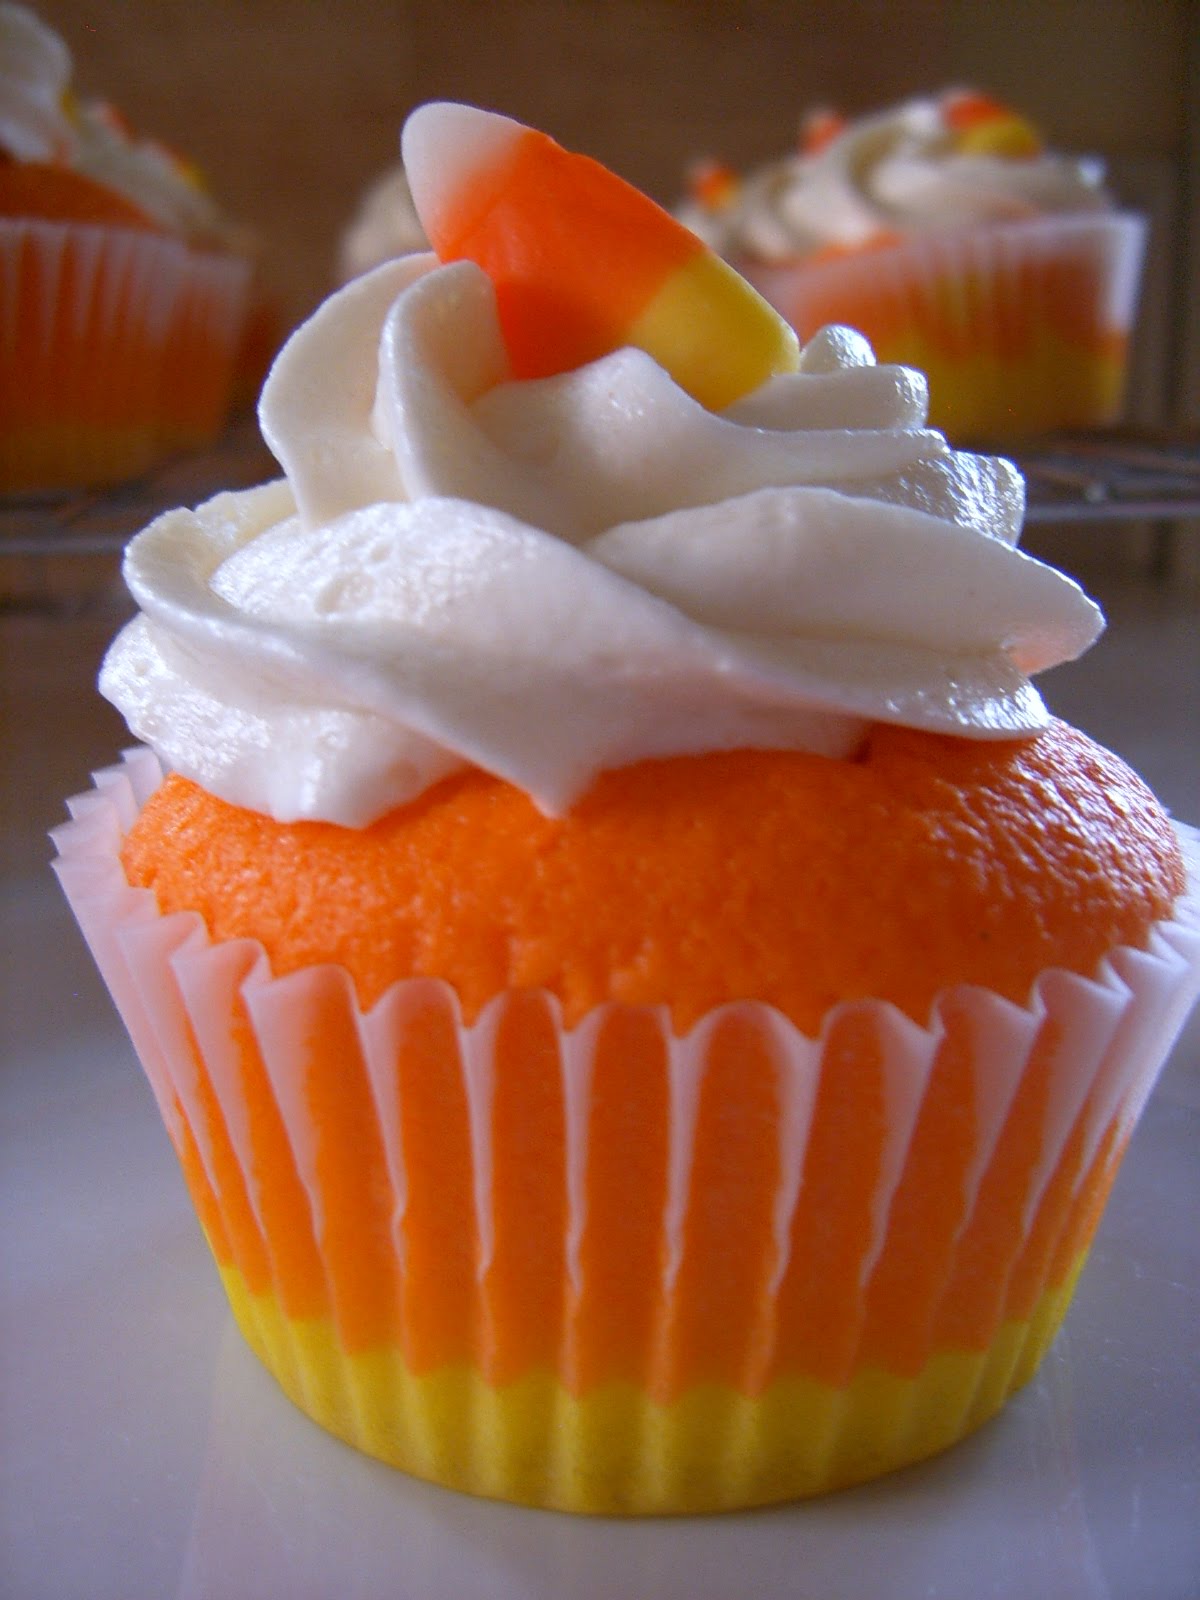
1) Candy Corn Cupcakes
Recipe courtesy of http://www.ourbestbites.com/2009/10/tutorial-how-to-frost-cupcakes-plus-candy-corn-cupcakes/.
1 18.25-oz. white cake mix (Duncan Hines, Betty Crocker, etc.)
1 c. sour cream
1/2 c. vegetable oil
3 large eggs
1 tsp. almond extract
Yellow and orange Wilton food gel (about a heaping 1/2 tsp. of each)
A double batch of frosting and filling (Or you can buy a few containers of vanilla frosting from the store).
1 bag of candy corn
NOTE: You will need frosting bags and a star tip to go over the bags. This will help you make the frosting design at the end
Preheat oven to 350 degrees. Line 2 24-cup muffin tins with white paper liners (although you may not make it to 24 cupcakes). Combine all ingredients except for food coloring in a large bowl and beat on low speed for 1 minute. Scrape down the sides of the bowl and then beat on medium for 2 additional minutes.
Divide batter equally into two bowls; you should have about 2 1/4-2 1/2 c. of batter in each bowl.
Mix about 1/2 heaping tsp. of yellow coloring into one bowl of batter and 1/2 heaping tsp. of orange coloring into the other bowl.
Divide the yellow batter evenly among the muffin tins. Holding the edges of each pan firmly, bang the pan a few times on the counter to level out the batter. Repeat the process with the orange batter. Bake for 20-22 minutes or until a toothpick inserted into the center of a cupcake comes out clean. Remove from oven and allow to cool for about 5 minutes in the pan and then allow to cool completely on a cooling rack.
When the cupcakes have completely cooled frost them and top with a candy corn.
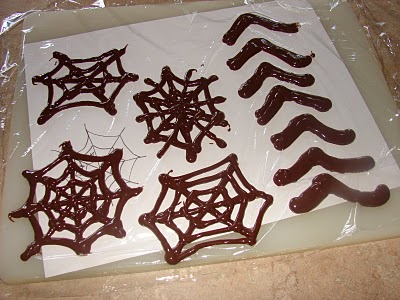
2) Chocolate spider webs:
This idea came from http://ipsybipsybakeshop.blogspot.com/2010/10/creepy-crawling-cake.html for a cake with chocolate spider webs used as decoration. I thought it might be cool to make the webs as a chocolaty Halloween snack themselves.
For the webs:
Frosting bags and piping tips (if you’re the only one making them just get one of each for you)
Semi- sweet melting chocolate (as much as you need to feed the number of people these are for- 1 person could probably eat 2 or 3 of these).
Wax paper
Powdered sugar or crushed graham crackers
Sketch some spider web designs onto a piece of computer paper with a pen or pencil. Place a piece of wax paper over the computer paper. Melt the chocolate and pour it into the frosting bags. Pipe out your web designs onto the wax paper and allow the chocolate to begin to harden. When the chocolate is no longer “runny,” place the wax paper in your refrigerator to keep it hardened. Before your trick or treaters/guests arrive, peel the wax paper away from your webs and place them on a serving dish or plate. You can sprinkle powdered sugar on them or crushed graham crackers if you’d like

3) Finger Cookies:
Recipe courtesy of http://allrecipes.com/Recipe/Spooky-Witches-Fingers/Detail.aspx?evt19=1.
1 cup butter, softened
1 cup confectioners’ sugar
1 egg
1 teaspoon almond extract
1 teaspoon vanilla extract
2 2/3 cups all-purpose flour
1 teaspoon baking powder
1 teaspoon salt
3/4 cup whole almonds
1 (.75 ounce) tube red decorating gel
Combine the butter, sugar, egg, almond extract, and vanilla extract in a mixing bowl. Beat together with an electric mixer; gradually add the flour, baking powder, and salt, continually beating; refrigerate 20 to 30 minutes.
Preheat oven to 325 degrees and lightly grease your baking sheets.
Take the dough from the refrigerator in small amounts. Scoop 1 teaspoon at a time onto a piece of wax paper. Use the wax paper to roll the dough into a thin finger shapes. Press one almond into one end of each cookie to give the appearance of a long fingernail. Squeeze cookie near the tip and again near the center of each to give the impression of knuckles. You can also cut into the dough with a sharp knife at the same points to help give a more finger-like appearance. Arrange the shaped cookies your baking sheets so they will not stick together while baking.
Bake 20 to 25 minutes or until a nice golden brown. If you like doughier cookies then back for about 5 minutes less.
Remove the almond from each cookie; squeeze a small amount of red decorating gel into the cavity; replace the almond to cause the gel to ooze out around the tip of the cookie.